The other day I went home with a general idea that I would be making something that resembled this dish, but hunger got the best of me and I ended up having a quick turkey sandwich for dinner instead. I still cooked though and this is what I came up with. This was a fridge clearing meal of sorts to use up some kale before it went bad and the last of the cherries I hadn't snacked on. This is one of my favorite lunches I have made for myself recently. There is a lot of flavor in each component from the farro cooked in chicken stock to the garlicky kale and sweet cherries. This can be altered in many ways to make it vegetarian or vegan. Instead of using chicken, sub with some tempeh or tofu and cook the farro in vegetable broth or salted water. Try adding some toasted nuts or goat cheese or feta to add to the textures. This recipe is transportable and would be a great addition to a picnic or perhaps your Memorial day barbecue.
It's going to be a busy long weekend. Hope you have a great one!
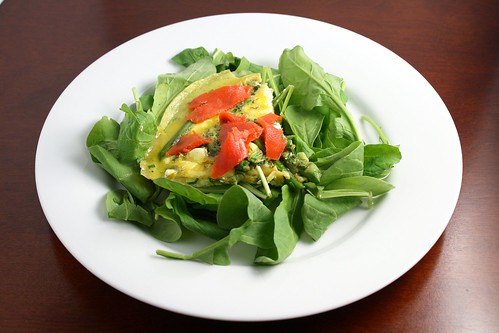
Spicy Farro Salad with Kale, Chicken, and Cherries
(By Esi)

Makes 2 main dish servings
1 cup farro, soaked or rinsed
2 cups low-sodium chicken stock
Extra virgin olive oil as needed
1 bunch of kale, washed and patted dry with the leaves roughly torn
3 cloves garlic, minced
1/4-1/2 teaspoon dried red pepper flakes
2 boneless skinless chicken breasts or thighs cut into chunks
1-2 handfuls cherries, pitted and sliced in half
Salt and pepper to taste
In a large pot combine the farro and chicken stock. Bring to a boil, then reduce to a simmer. Cover and let the farro cook 12-15 minutes until tender, but still chewy. Drain, and set aside.
In a large skillet, heat 1-2 teaspoons olive oil over medium heat. Add the garlic and cook until fragrant, about 30 seconds. Add the kale and red pepper flakes. Season with salt and cook until the kale is wilted, about 3-4 minutes. Toss the kale with the farro.
Season the chicken with salt and pepper. In the same pan you cooked the kale in, heat another 1-2 teaspoons of oil over medium heat. Add the chicken and cook 6-8 minutes until the chicken is cooked through.
In a large bowl, toss the kale and farro mixture with the cooked chicken and cherries. If the mixture is too dry, add a bit more oil. Taste and adjust the seasonings with salt and pepper as needed. Serve warm or at room temperature.
Printable Recipe